|
|
|
|
El Camino Nitrouso
|
||
|
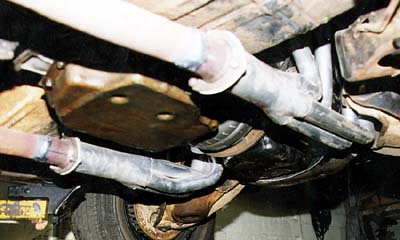
It was the great Scottish poet Robert Burns who wrote "The best laid plans of mice and men aft gang aglee," which roughly translated means no matter how long you allow for the completion of a project car figure it will take twice that long and nothing that is supposed to just bolt on does. I now know this to be true after spending a year on project El Camino Nitrouso and only being halfway through a project that was supposed to be finished in about four months. In the last installment we went through the steps to install our NOS nitrous system, route lines, install the bottle and then modify and install an aftermarket steering wheel to hold the arming switch for the nitrous. After my self-induced wounds incurred from installing the aftermarket wheel healed and my friend Bill Weckman forgot how much of a pain in the ass it is to work with a mechanically challenged magazine editor, he reluctantly agreed to go on to the next step required to transform the El Camino into the Wednesday Night Warrior. Since the engine had a little compression, a nitrous kit, and a good ignition system we both agreed that headers and high performance mufflers would be required. As mentioned in the last installment, I called the folks at Dynomax and blatantly asked them for a set of headers and aftermarket mufflers. I chose them because of their involvement with the NMCA series and the number of cars I had seen at those races with their headers. They agreed to furnish the headers and mufflers and not too long after talking with one of their techs a big box with the headers and mufflers appeared on DRO’s office doorstep. The technician at Dynomax told me over the phone that the headers should fit but might require a little work to clear everything. He was absolutely right. The installation of the headers required a little work, including a little heating and moving, but the JetHot coated headers fit and look really cool.
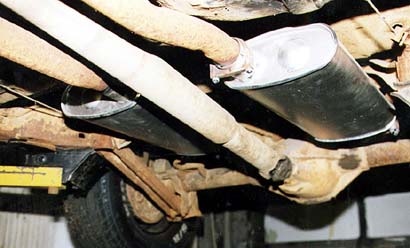
Next we took the Dynomax street mufflers down to Mad Hatter Muffler in Granite City, Illinois to weld up the flanges to connect the headers to the stock exhaust pipe and then cut and weld the mufflers in.
The total money out of pocket required to install the headers and mufflers was about $50.00 including the cost of a case of Budweiser. When the installation was finished I actually got to drive the El Camino for the first time as I drove it back to the garage. The mufflers are quiet but when you hit the pedal there is enough sound to let you and your neighbors know there is a big block behind them.
About the time we tightened up the last nut on the last shock we ran out of daylight, adult beverages and energy so we decided to retire to the local pub to do a little bench racing. In the next installment we are going to put a 3.73 gear in the 10 bolt posi that was in the truck when we got it. We will also hook up the gauges, attach a manual chock to the quadra-jet and show you the trick steel wheels we came up with. Hopefully, by March when the dragstrip opens for business here in St Louis we will be ready for a trip to the Wednesday night drags with Drag Racing Online’s crew to see if we can smoke a set of used, hard tires for a quarter-mile. Then we may bolt on a set of Mickeys and get serious. Remember kids, this is all about having fun at the drags and no wagering please.
photos by Jeff Burk
|
||
|
Copyright 1999-2001, Drag Racing Online and Racing Net Source |
||
 OK.
The El Camino is now actually driveable, but I found out in that short
drive that the stock suspension wasn’t going to be up to the abuse
we planned for our Wednesday night warrior. The first time I brake-torqued
the motor and hit the gas pedal, the rear wheels hopped like a worm
on a griddle. The El Camino
OK.
The El Camino is now actually driveable, but I found out in that short
drive that the stock suspension wasn’t going to be up to the abuse
we planned for our Wednesday night warrior. The first time I brake-torqued
the motor and hit the gas pedal, the rear wheels hopped like a worm
on a griddle. The El Camino 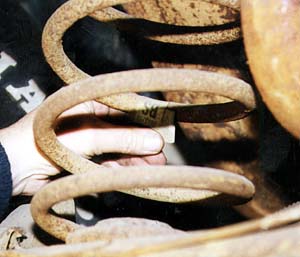 still
had the stock shocks and springs in front and air shocks in the rear
and unless I planned to haul a lot of weight in the bed or pull a
trailer the stock shocks weren’t going to cut it. I called my buddy
Jim Salemi at G-Force Race Cars and asked what we could do to make
the suspension and ride better—short of putting on one of his swing
arm suspensions. I didn’t like his first suggestions of me lying down
in the bed to improve weight transfer or letting someone else drive,
so after the hysterical laughter died down he told me to replace the
stock front shocks and rear air shocks with a good aftermarket shock.
still
had the stock shocks and springs in front and air shocks in the rear
and unless I planned to haul a lot of weight in the bed or pull a
trailer the stock shocks weren’t going to cut it. I called my buddy
Jim Salemi at G-Force Race Cars and asked what we could do to make
the suspension and ride better—short of putting on one of his swing
arm suspensions. I didn’t like his first suggestions of me lying down
in the bed to improve weight transfer or letting someone else drive,
so after the hysterical laughter died down he told me to replace the
stock front shocks and rear air shocks with a good aftermarket shock.
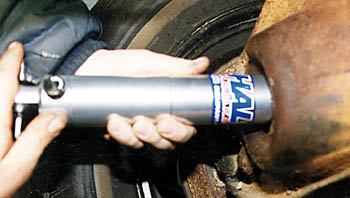 I
called Hal Lees at HAL/QA1 shocks and told him what I was trying to
do and promised him a lot of good press in return for a set of shocks.
He fell for it and sent me four adjustable shocks for the front and
rear. When those arrived we put the El Camino up on a borrowed lift
and prepared to do the installation.
I
called Hal Lees at HAL/QA1 shocks and told him what I was trying to
do and promised him a lot of good press in return for a set of shocks.
He fell for it and sent me four adjustable shocks for the front and
rear. When those arrived we put the El Camino up on a borrowed lift
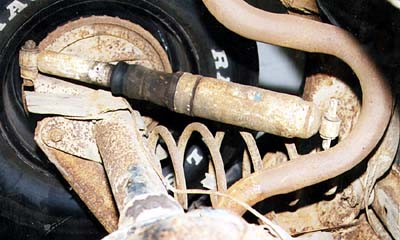
and prepared to do the installation. 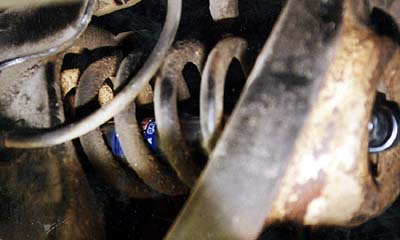 The
good news was that the bolts that had been holding the shocks in place
for over 40 years freed up easily; the bad news was that the barrels
of the 40 year old stock shocks were considerably smaller in diameter
than those of the aftermarket shocks. As a result, the holes in the
control arms that the shocks fit through had to be enlarged. A couple
of minutes with a grinder solved that problem and the front shocks
were bolted in. Replacing the rear shocks was a much easier program
as they simply bolted in. The total time to remove and replace the
shocks was about an hour.
The
good news was that the bolts that had been holding the shocks in place
for over 40 years freed up easily; the bad news was that the barrels
of the 40 year old stock shocks were considerably smaller in diameter
than those of the aftermarket shocks. As a result, the holes in the
control arms that the shocks fit through had to be enlarged. A couple
of minutes with a grinder solved that problem and the front shocks
were bolted in. Replacing the rear shocks was a much easier program
as they simply bolted in. The total time to remove and replace the
shocks was about an hour.