![]()

Part 1 - Prep, Parts and Removal
by Matt Rose
7/24/04
![]() he
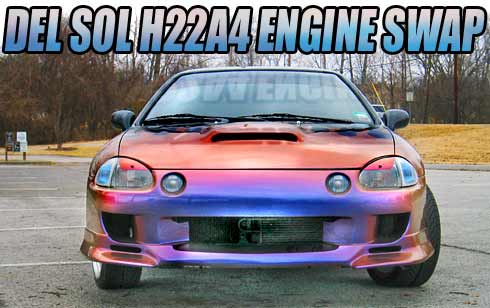
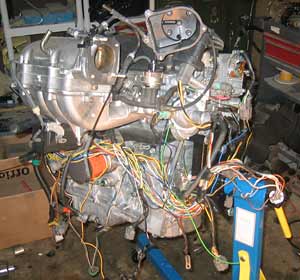
project was to take an SOHC 1.6 liter v-tech D16z6 out of a 1994 Honda Del Sol
and then put in a DOHC 2.2 liter v-tech H22A4 from a 2000 Honda Prelude. The
1.6 liter put out 125 hp at the crank and ran around 14.9-15.2 in the quarter
mile. The 2.2 liter H22A4 put out 220 hp at the crank.
he
project was to take an SOHC 1.6 liter v-tech D16z6 out of a 1994 Honda Del Sol
and then put in a DOHC 2.2 liter v-tech H22A4 from a 2000 Honda Prelude. The
1.6 liter put out 125 hp at the crank and ran around 14.9-15.2 in the quarter
mile. The 2.2 liter H22A4 put out 220 hp at the crank.
The first step was to figure out what parts were needed. So I did some research and came up with a list of the main parts needed to do the swap.
| 1. Engine: H22A4 2. Transmission: 5-speed out of a Prelude or Accord 3. Custom Axles 4. ECU |
5. Motor Mounts 6. Shift Linkage 7. Slim Radiator Fan 8. Wire Harness |
Now it was time to get into the fun and start some of the work! In an effort to save the paint I took off the front clip, fenders and hood. This also gave me more space to work in. After that was done I drained the coolant and took out the radiator assembly. Then I put the car up on jack stands, took off the wheels and disconnected the battery. Now it was safe to start unplugging the engine harness from the car. There are two sets of plugs located at the shock towers, then one wire that connects the alternator to the fuse box.
The fuel lines can be disconnected from the fuel rail. Both will leak fuel out; you can pinch the rubber hoses with vice grips to minimize leaking fuel. Next I disconnected the vacuum lines that run from the engine to places on the fire wall like the brake booster emissions canister. Be sure to remember where all this stuff goes!
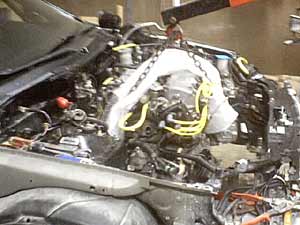
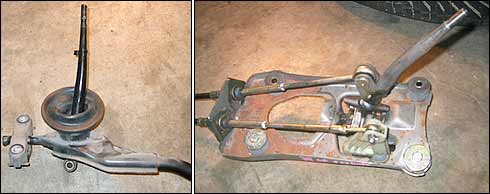
When it was time for the suspension to be taken out, I loosened the lower ball joints and the steering tie rod ends. Then I took off the axle spindle nuts and was ready to take the axle out. I unbolted the exhaust and the collector, and the engine was almost ready to drop out. At this point I needed an engine hoist to remove the engine properly. I put the hoist into position and chained it to the engine. I was sure to not just bolt it to the intake. I found some good spots to bolt the chain up so the weight was distributed evenly. When the engine was secure I started unbolting the motor mounts. There are five of them: the tranny on the pass side, the heavy mount on the driver's side, the rear mount in the middle of the fire wall, and one more either side on the underside of the two frame rails. Then I removed the engine slowly. Remember: if something is still connected you can disconnect it before it breaks.
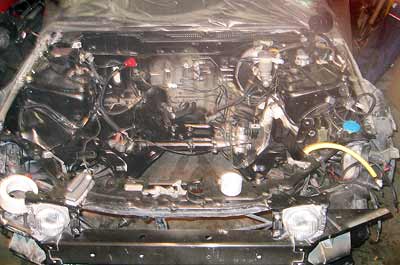
Prepping the engine compartment to put in the new motor was simple. I cleaned
the whole engine compartment and then painted it, which is unnecessary but I
figured that I might as well do it now to get it out of the way. The old exhaust
was unusable so I took it off. The new engine mounts are heavier duty than the
stock mounts, so there are only three with a solid rear mount. To get the engine
to drop in properly, the passenger mount needs to be modified so the shifting
mechanism will clear and then the engine mount bolts line up perfectly. I also
installed the slim fan in place. When you install the slim fan, make sure that
it is a high flow slim fan or you will have cooling problems.
There is one down side to swapping to the H22. The power steering will not
clear, so if you're working on a car with power steering, take the lines on
the steering rack and run them into each other with a pipe. Try to keep fluid
in the lines or put in a manual steering rack. Another task is to convert the
linkage style shifter to a cable style. A hole has to be cut for the cables
to drop through and then run to the transmission without binding them, or you
won't be able to shift properly. Then I mounted the shifter in place of the
stock one. The shifter was tall, so I cut a section out to suit placement in
the cabin. This was important to me; I didn't want it to feel odd or uncomfortable
while driving. ![]()
NEXT ISSUE: Wiring the new motor, performance upgrades, and putting the new motor in
Copyright 1999-2004, Drag Racing Online and Racing Net Source