Twisting Knobs...
 |
|
The
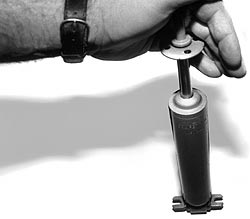
C-E shock must be removed from the
car to set the valving. First, hold
the shock upright and run it through
it's travel ten or twelve times.
This purging effectively removes
any aeration inside the shock. If
you "stroke" the shock upside down
or sideways, air is allowed into
the shock and you won't get the
adjustment right.
|
|
Many AVO, Hal Corp and QA1 drag race shocks
are similar when it comes to adjustment. The
shock absorber doesn't have to be removed for
adjustment. Once it's installed in the car,
all changes are handled externally by the adjustment
knob. After installation, the knob is accessible
through the side of the spring (typical front
applications).
The shock setting system works like this: Turn
the knob counterclockwise. The "end" of the
adjustment (where it will not turn and click
any further) is the softest setting. By turning
the knob clockwise, each click will increase
the shock resistance. Typically, these shocks
have an adjustment range of 12 clicks (it will
go further, but you run out of usable adjustment
range). The actual range works like this: six
clicks clockwise equals 50/50 valving (approximately).
The full stop counterclockwise (front shock
baseline) has valving that's similar to a 90/10.
As you can see, this offers a very large range
of adjustment. Once you go past six clicks clockwise,
the adjuster works primarily on extension (rebound).
When the shock is past this point, the valving
is quite stiff, and probably won't be needed
for a drag application.
 |
|
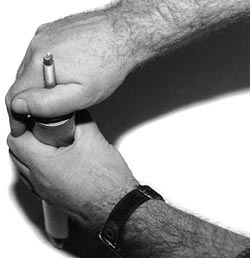
Fully
depress the shock (maintain the
upright orientation) and line up
the notch on the collar with the
setting range on the shock body.
With the shock still depressed,
rotate the adjustment collar clockwise
until a click is heard. This means
that the internal adjustment mechanism
is now engaged. Rotate the notch
on the indicator until it reaches
the desired setting ("XF", "F" or
"R"). You can now reinstall the
shock.
|
|
Which End Do You Adjust First?
So, you have the shocks. You know how to adjust
them. And you know how to install them on your
car. Now what? Although it seems like the right
thing to do, the initial setting on your adjustable
shock absorbers should not be at the center
point of adjustment. The first thing you need
to do is to baseline the shock absorbers. In
the case of the C-E shocks, set the front shocks
on the loosest setting ("R" or 10/90). Likewise,
the AVO-Hal Corp-QA1 front shocks should also
be set on their lowest value (the knob setting
fully against the counter clockwise seat). These
"soft" settings allow the front end to lift
as quickly as possible, transferring as much
weight as possible to the back of the car. Additionally,
these settings offer a considerable amount of
compression. That means that the nose will settle
down slowly.
Next, set the rear shocks for a baseline. In
the case of the C-E shocks, set the valving
at the 50/50 value (code "R"), which is the
softest setting. The AVO-Hal Corp-QA1 shock
is slightly different. In the case of an automatic
car, turn the adjustment knob three to four
clicks clockwise. Stick cars should have slightly
more damping -- five to six clicks clockwise
should be the baseline. Once the baseline is
established, make a short pass (first gear and
part way through second gear only) with the
car. The following are the steps you should
take when tuning the front and rear shock combination:
Step #1: Front or Back? If the car wheel stands
excessively or bounces on the gear change (more
likely), adjust the front shocks first. If the
car rattles the rear tires, wheel hops or has
way too much body separation, then adjust the
rear shock absorbers first.
Step #2: Front Shock Adjustment: The idea is
to get a smooth transition in the front-end
movement as the car launches right through the
first gear change. Bouncing and jerking motions
do not help the launch or the ET for that matter.
If the car is violent on the launch and physically
jerks the front wheels off the ground, the shock
setting is too soft or loose. If the car bounces
on the gear change the shock needs to be stiffer.
When the car bounces on the gear change, it's
coming down on the front suspension travel limiter,
then bouncing back up again. Obviously, if the
shock is set too tight (stiff), then the front
won't move sufficiently to transfer weight.
On a similar note, a too-stiff setting on the
front shock will bounce the car on the tire
after the launch. Don't get this confused with
bouncing off the limiter.

|