| 
HOW DOES IT WORK?
 The
basic steps for using this charger are simple: It hooks up
like a conventional charger – black lead to negative
on the battery, red to positive, and then connect to a AC
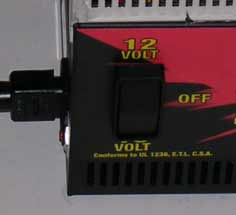
power supply. Flick the main switch (left side of the charger
face) to 12 or 16 volts (dependent upon the battery type)
and watch the show. The
basic steps for using this charger are simple: It hooks up
like a conventional charger – black lead to negative
on the battery, red to positive, and then connect to a AC
power supply. Flick the main switch (left side of the charger
face) to 12 or 16 volts (dependent upon the battery type)
and watch the show.
Aside from hooking up the respective leads, the only input
required from you to operate this charger is to select between
12 volts, 16 volts and Off! The solid-state circuitry inside
the charger does the rest of the work.
The brains of the charger take over. Once the charger is
switched from OFF to ON (choosing the appropriate battery
type – 12 or 16V), the Green-Yellow-Red LED’s
on the right side of the charger will indicate in sequence
the battery charger self-test. After this sequence (which
takes roughly two seconds), the red will come ON, indicating
the beginning of the
ADVERTISEMENT
 |
charge. If there is no battery connected,
the yellow LED will flash briefly once each second, indicating
that the AC power to the charger is connected.
With a battery connected, the charger will begin to charge
the battery, as indicated by the red charging LED’s.
The length of time the charger remains in the “Charging
Mode” depends upon the size and state of discharge of
the battery.
This is controlled by the charger’s internal “brain”
(actually, solid state circuitry) that constantly monitors
the state of the battery and provides the correct charge automatically.
When the green “ready” LED comes ON, the battery
is ready to use. The battery may be connected to the charger
in the “Ready” mode indefinitely, in order to
maintain the battery in a fully charged state while not in
use without the risk of overcharging.
 Instead
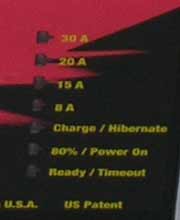
of a traditional amp gauge on the face of the charger, the
Moroso Power Charger incorporates a series of easy to understand
LEDs that indicate the charge status. Unlike some battery
chargers of old, this charger is intelligent enough to determine
when the battery is fully charged. At that point, it functions
as a battery “tender”. Instead
of a traditional amp gauge on the face of the charger, the
Moroso Power Charger incorporates a series of easy to understand
LEDs that indicate the charge status. Unlike some battery
chargers of old, this charger is intelligent enough to determine
when the battery is fully charged. At that point, it functions
as a battery “tender”.
During the charging, the current flowing into the battery
is indicated by the LED Amp Meter. At the start of the charge,
if the battery is normally discharged, all 4 red LED’s
will be on, and will go out in sequence as the charge current
drops. When the last red LED goes off, the internal proportional
timer will start. The green LED will show proportional to
the time of the constant current time. If the battery voltage
is less than 1/2 a volt, then the battery is considered very
heavily discharged. In this case, the yellow charging LED
will not show.
NO COST OPTIONS…
Internally, the battery charger is equipped with a resettable
“BTS” or “Battery Type Switch”. This
is an internal switch that can be set by the dealer or an
authorized service technician. When shipped form the factory,
the charger is set in the “normal mode” which
is for sealed lead acid or equivalent batteries. An internal
switch allows the charge to be set for Gel Cell batteries
or Minimal Gas Emission Batteries. Another option is to switch
the battery over for use with vented liquid lead acid batteries
(fast charge mode). Moroso points out that this switching
process is not for consumers, and must be set by an authorized
technician or a dealer.
| Source |
Moroso Performance Products
80 Carter Drive
Guilford, CT 06437-2116
PH: 203-453-6571 |
As you can see, with this charger, you really don’t
need more than one charger for the job. Best of all, you don’t
have to babysit the battery as it’s being charged. A
“smart” battery charger? Looks like it to me.

|
