|
<<
PREVIOUS PAGE
Before I set them in for some trial fitting
I installed the half-inch thick AuVeCo foam
weather stripping. This will make sure the windows
are fitted at the correct height. When you are
deciding on what thickness of weather stripping,
you want to just measure from where you want
the outside of the window to the where the weather
strip will sit. I allowed for 1/8-inch compression
of the rubber for tightening and to make sure
it sealed.
When you are looking for a rubber seal, try
to find automotive weather stripping as it is
a closed cell foam and will not absorb water.
If you use regular household foam it may soak
up water and stay wet, which can rust the window
opening and discolor the foam seal. I found
what I needed at a local auto body supply store.
A fifty-foot roll cost me $28.00 and I used
about forty feet getting it finished. One side
had adhesive on it so it stayed in place and
worked out just great.
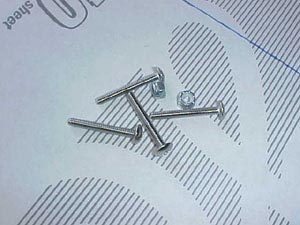 |
| I
recommend using stainless mounting
hardware so you won't have to deal
with rust problems. I chose 10-24
Phillips head stainless steel machine
screws with oversize head. Fifty of
them cost $4.25 and nyloc stainless
nuts cost $5.24. |
|
When you are trial fitting everything it is
a good idea to use a grease pencil and mark
where you want the mounting holes drilled. Look
for problem areas that will be hard to reach
or where there is already a hole that you do
not want to hit while drilling. When I found
where I DID NOT want to drill I measured the
opening and divided the distance into equal
parts. I ended up with approximately five inches
between my mounting screws. I am not sure if
they should be closer or if they could have
been spread apart more but it is a starting
point that looks pretty good. The key to this
whole deal is TAKE YOUR TIME and CHECK IT TWO
MORE TIMES BEFORE YOU DRILL THE MOUNTING HOLES.
I used a drill size that was 1/16-inch larger
than the 10-24 stainless machine screws I used
to retain the windows. This should prevent cracking
the Lexan when it expands and contracts in the
heat and cold. DO NOT OVERTIGHTEN the mounting
screws, I pulled them down until the foam sunk
about 1/8-inch. Use self-locking NyLoc nuts
so they will stay in the position you tighten
them to.
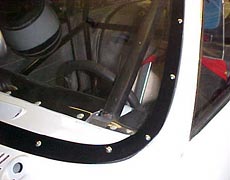
Here is a close up of the windshield after
installation. After I had everything fitted
and drilled I masked off about two inches
on the inside of the window and painted
it with semi-gloss spray paint. It gives
it a very nice finished look, can't peel
or chip because it is on the inside, and
covers up the windshield opening and
weather stripping. |
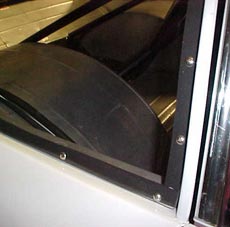
This is the Lexan side window. You can
see the mounting screws and the black
weather stripping. I tightened the screws
down about 1/8-inch after the Lexan hit
the weather strip. |
The next "little project" was finishing the
wiring. I have it about 95-percent done and
will complete it all when the engine is installed
and I know exactly where the water pump and
fan wires need to be as well as the wires to
the coil and distributor. I have the main battery
cables installed and the master shut-off switch
done as well as the wires from the switch panel
to the terminal strips I will use to hook up
items like the water pump, fuel pump, lights,
ignition, fans, etc.
As I have done with most of this car I did
a lot of "garage engineering" rather than just
ordering some of the stuff. The master disconnect
switch would have been easier to just mount
through a hole drilled in the back body panel
but I also wanted a way to turn off the power
(or turn it on) from the driver's seat. This
meant a small rod and a knob in back of the
car that is connected to the master switch.
NEXT
PAGE >>
|